
For a striped terry cosmetic bag, Rivta resolved a panel-development problem by bonding 30 g/m² nonwoven to the fabric back and then aligning and die-cutting each piece individually. Getting there took two unsuccessful cutting routes: the first produced badly skewed stripes; the second produced panels that were the right size when cut but too short after embroidery.
The useful lesson for a procurement team is to approve stripe alignment and dimensions at the stage when the decorated panel is ready for sewing. A correct measurement immediately after cutting covered only part of this project's approval task.
This case concerns development of a custom cosmetic bag. The dimensions below belong to a flat cut panel, rather than the finished bag.
The panel was 1.7 cm short before sewing
The required panel size was 39 × 21.2 cm. After embroidery, the reported size was 39 × 19.5 cm: the 39 cm side remained the same in the supplied dimensions, while the 21.2 cm side was 1.7 cm short. The factory described the observed shortening as approximately 1.5–2 cm.
| Dimension | Required panel | Panel after embroidery |
|---|---|---|
| Long side | 39 cm | 39 cm |
| Short side | 21.2 cm | 19.5 cm |
| Shortfall on the short side | — | 1.7 cm |
The panels were being prepared for the production sample when this discrepancy was found. The factory judged them unsuitable for bulk production. A panel that matches its cutting pattern at the first inspection still needs to meet the required dimensions after the planned decoration operation.
Three routes, two different problems
| Route | What was done | Observed outcome |
|---|---|---|
| Die cutting with a loose underlay | Nonwoven was placed underneath the terry material for knife-die cutting. | A 60-piece trial showed severe stripe skew. Those pieces could not be used. |
| Laser cutting | The cutting route was changed. Panel dimensions were correct immediately after cutting. | After 60 panels were embroidered, shortening of about 1.5–2 cm was found before sewing. The reported panel size was 39 × 19.5 cm against the required 39 × 21.2 cm. |
| Bonded backing and individual alignment | 30 g/m² nonwoven was bonded to the material back. Each piece was aligned and knife-die cut individually. | The factory reports that this revised route resolved the development problem. |
The two 60-piece figures describe the reported trial stages. They are not a minimum order quantity or a statement of the bulk order size.
The first issue was stripe registration
For the initial die-cutting route, the visible stripes were too skewed to use. Loose nonwoven underneath the material had already been tried. That matters: describing the final correction simply as “add nonwoven” would leave out the difference between the two setups.
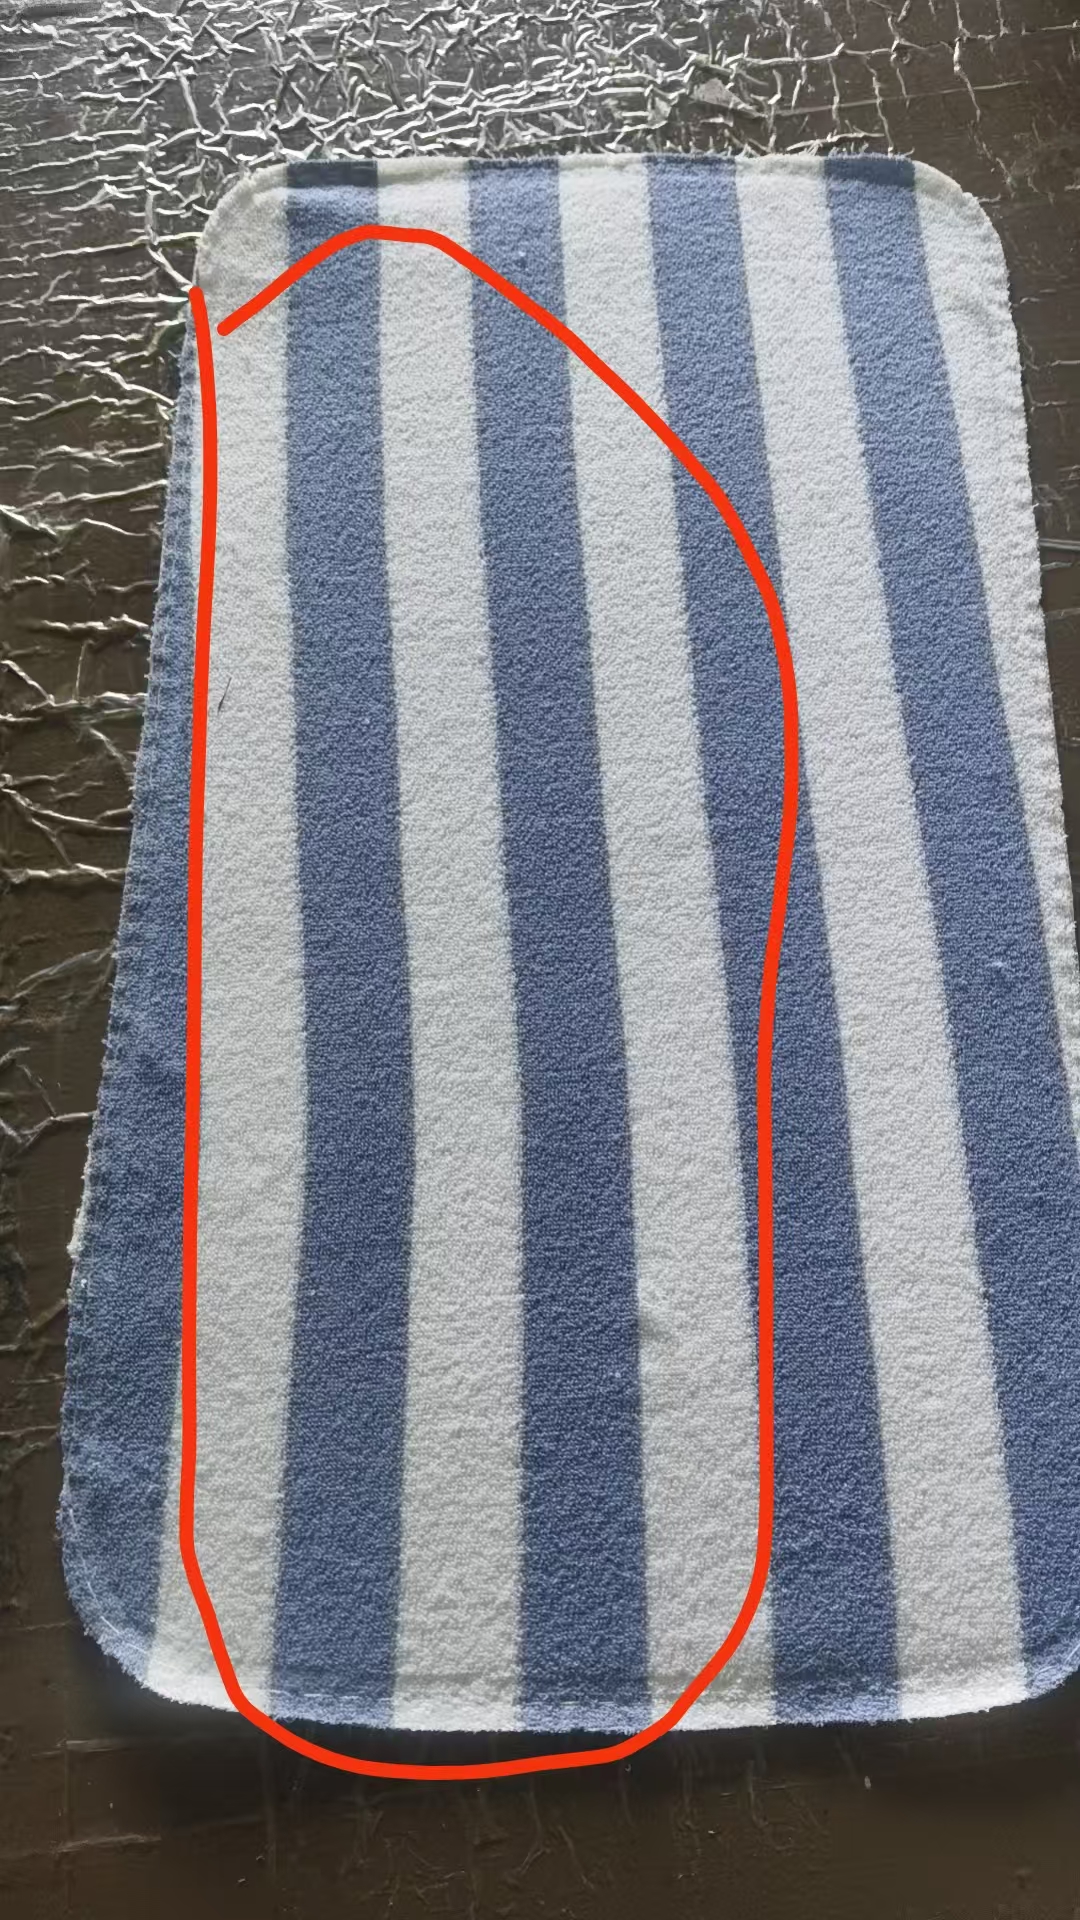
A buyer's reference should therefore show where the stripes sit relative to the panel outline, rather than specify “striped terry” alone. For a square bag, agree the visible stripe direction and the important alignment points on the actual pattern. If matching across adjoining panels matters to the design, identify those junctions in the brief so they can be reviewed during sampling.
The second issue appeared after decoration
Laser cutting gave the correct initial dimensions, but that result did not settle the next stage. The size discrepancy was found after embroidery, before the panels went into sewing.
The sequence supports a practical inspection decision: measure the decorated panel again before sewing. It does not establish that laser cutting alone, or embroidery alone, caused the shortening. Switching cutting technology had changed the first outcome without producing a usable decorated panel for this project.
What changed in the workable route
The final route combined two decisions: bond the 30 g/m² nonwoven to the material back, and align and die-cut one piece at a time. The backing was part of the material construction during cutting; it was no longer a loose layer placed below it.
Individual alignment also made stripe positioning an explicit step for each panel. For this project, the factory reports that the combined change solved the problem. That is the route to carry into the next sample review, together with the required panel dimensions and the stripe reference.
These changes were made together. The case does not isolate the backing as the sole cause of improvement, and 30 g/m² should not be copied into every terry bag specification as a universal requirement. Review the complete construction and the actual decoration route for the bag being developed.
If this kind of change is made after a sample has already been approved, identify the reference being replaced and the affected approvals. Our guide to changes to an approved cosmetic bag sample explains that separate handover task.
Carry two approval references into your terry bag brief
For a similar project, send the factory a dimensional reference and a stripe-position reference. Keep them tied to the same panel and to the actual sequence of backing, cutting, decoration and sewing.
- Dimensional reference: the flat panel drawing, measurement endpoints and required dimensions, plus the finished bag dimensions as a separate item. Agree the applicable tolerance for your project.
- Stripe-position reference: the intended stripe direction, the edges or seams where alignment matters, and an annotated sample photograph or pattern.
- Review stage: inspect stripe appearance and remeasure after the planned decoration, before releasing those panels for sewing. Include the revised backing and cutting route in the sample record.
Ask for the actual decorated panel as well as the assembled sample where this decision is important. The panel lets the team review the cutting outline and decoration-stage size; the assembled sample answers the separate question of how the stripes and shape read on the bag.
Water-wash dimensions are a different requirement. If your brief includes washing, specify and assess that separately; our cotton cosmetic bag size and washing guide covers that distinction. The figures in this terry case were observed in production development, not in a washing test.
Case basis and scope
This anonymised account is based on Rivta's factory development information and original workshop photographs supplied for publication. The photographs illustrate the panels and stripe appearance; the dimensions are from the factory account, not readings taken from the pictures. The corrected route is reported as resolving the problem, without a separate final remeasurement table. Fibre composition, the mechanism of shortening, wash performance and long-term backing durability are outside this case.
Developing a striped terry pouch? Send your panel drawing, finished bag size, stripe reference, decoration artwork and intended quantity. Request a striped terry panel and sample review so we can review the construction and approval stages for your project.
About the Author

WRITTEN BY JOLIAN LU, SEO MANAGER
Hi there! I'm a mom to an awesome eleven-year-old boy. I started in this business as a fresh-faced graduate and now lead Rivta-Factory's SEO and content work. Here to share my passion for sustainability and building a business that cares. Let's grow together!
